Team:AUC Turkey/Notebook
From 2012hs.igem.org
| Sponsors | ||
|---|---|---|

|

|

|
February
February 25 Saturday
- Today was the beginning of our lab lessons.
- Accompinied by the Fatih University 2012 iGEM Team, we learned how to prepare LB Broth from our advisor Burak Yılmaz.
Procedures for LB Broth Preparation
- In a steril enviroment, the tare of the container should be measured and subtracted from the overall weight.
- 7 grams of LB Broth is put in the container.
- 200 ml distilled water or is put into a graduated cylinder.
- These two are mixed in a beaker.
- The opening of the beaker is covered with aliminium folio in such a way that it does not conctact with air.
- Autoclave tape is sticked on to the aliminium.
- The beaker is placed in to the autoclave machine.
- Distilled water or demineralized water is put into the autoclave machine. The water level in the autoclave machine has to be a little higher than the liquid level of the beaker.
- After closing the lid of the machine, the 90 minute autoclave process is given start.
- Afterwards, the
March
March 5 Monday
Project Decision
1st Day of Brainstorming
Ideas
- Battery Bacteria
-Bacteria producing electricity
 -Inspired by the original Geobacter, we wanted to increase the electricity output.
- Sound Insulator Bacteria
-Bacteria with the ability to absorb sound
 -With the genes taken from the pigment Melanin, we wished to use them for sound insulating purpouses.
- Water Cleaner Bacteria
-Bacteria able to precipitate salt in salty water.
 -By causing the salt to precipitate, we were going purify the sea water.
- Radio-Reducer Bacteria
-Bacteria which can absorb radiation
 -The radio-absorbtion ability of cactus was to be implemented to E.coli.
March 9 Friday
- Together with the Fatih Team, we learned how to do isolation.
Procedures for Isolation
- The LB Media should be transferred to 1.5 ml centrifuge tubes.
- These tubes are then centrifuged at 13,000 rpm for 10 minutes at room temperature.
- After the centrifuge, the supernatent should be disposed without taking any pellets along with it.
- The pelleted cells should be suspended in 250 ul Resuspension Solution and the tubes should be vortexed so that no cell clumps remain.
- 350 ul Neutralization Solution should be added and the tube should be inverted immediately and throughly by inverting 4-6 times.
- Centrifuge for 5 minutes to pellet cell debris and chromosomal DNA.
- Transfer the supernatent to a spin column without taking any of the pellets.
- Centrifuge the spin column for 1 minutes and discard the liquid at the bottom. Place the column at the same tube again.
- Add 500 ul Wash Solution and centrifuge for 30-60 seconds. Discard the flow-through and place column back in.
- Repeat the same process again with 500 ul Wash Solution.
- Centrifuge for an additional 1 minute.
- Transfer the columns into 1.5 ml microcentrifuge tubes and leave their caps open for 2 minutes so that the ethanol that they contain dissolves in air.
- Add 50 ul Elution Buffer to the center of the silica membrane to elute the plasmid DNA. The pipette tip shouldn't the membrane. Incubate for 2 minutes and centrifuge for 2 minutes afterwards.
- Discard the spin column and store at -20 C.
March 10 Saturday
- We isolated the Red Fluorescent Protein, and with this we learned how to do isolation both practically and teorically.
Troubleshooting for Isolation
- While disposing the supernatent after the 10 minute centrifuge, do not do it from the side of the pellet. The liquid should not flow over the pellet because the pellet may be dragged with the liquid and the quality would drop.
- After the vortex, you should not be able to see any solid in the mixture. If you can see, vortex longer.
- The delay between the centrifuge and the vortex should be at most 3-4 seconds. Also the invert should be done gently.
- If any pellet is taken in, the supernatent should be disposed with it. It ıs important to not take any pellets.
- Extreme caution is required while adding Elution Buffer because the buffer should not be inserted at any part of the column other than the membrane.
- The tip should not conctact the membrane for the good of the isolation.
March 12 Monday
Project Decision
2nd Day of Brainstorming
Ideas
- Dandruff Exterminator Bacteria
-Bacteria with the ability to cure dandruff
 -Using the genes of Aloe Vera and Eucalyptus globolus was going to be done.
- Anti-stink Bacteria
-Bacteria with the ability of removing trimethylaminuria
 -With the required enzymes, the fish odor trimethylaminuria will be removed.
- Firefighter Bacteria
-Bacteria working with the principle of a fire extinguisher
 -The bacteria will consume the oxygen in the air which will leave the fire extinguished.
- Paper Cleaner Bacteria
-Bacteria which can consume the ink on paper
 -The bacteria will digest the ink which will result as a clean paper.
- Do-not-'Die'betes Bacteria
-Bacteria with the ability to produce insulin
 -Insuling level detection was going to be followed by insulin production.
March 19 Monday
We decided what our project was going to be.
Final Ideas
- Battery Bacteria
- Sound Insulator Bacteria
- Water Cleaner Bacteria
- Radio-Reducer Bacteria
- Dandruff Exterminator Bacteria
- Anti-stink Bacteria
- Firefighter Bacteria
- Paper Cleaner Bacteria
- Do-not-'Die'betes Bacteria
Winner: Anti-stink Bacteria
- With the decision of what we will do for our project, we started searching for the required the data for our project. We were divided into groups to search for the necessary data required. Since our project was going to be on a bacteria that removes bad smell and produces pleasent odor, we had to look for the following:
- Bad odors
-Trimethylamine
-Cadaverine
-Putrescine
- Good odors
-Vanillin
-Limonene
-Eugenol
-Benzaldehyde
-Cinnamaldehyde
-Geraniol
- Receptors
- A suitable construction
March 22 Thursday
- We arrived at the university and saw the preparations for the birthday of our dear advisor Mrs Gunduz. We had no idea so it was a suprise for us as well. We congragulated her and returned back(the birthday cake was awesome).
- We determined what the name of our project will be. The name is going to be "FreshEcoli".
F r e s h E c o l i
March 24 Saturday
- We started doing our first electrophoresis. We weren't there when the gel preparation was taking place as it was exam week. Everything was great, especially the part where we pipetted plasmid-coloring agent mixture was fun.
- Today was also the day of our first digestion. The process was done with great speed and we did great.
- The transformation that we missed out on was done today. The plates were ready for us to spread the colonies so we just did transformation and did not have to prepare any LB Agar.
Procedures for Transformation
- Transfer 500 ul LB Broth to 1.5 ml microcentrifuge tubes. This should be done close to a source of fire to prevent contamination.
- Place the microcentrifuge tubes containing LB Broth in a 42 C heat block for incubation.
- Take 1 ul plasmid and place them in 1.5 ml centrifuge tubes.
- Add 50 ul competent cells to the plasmid.
- Centrifuge them at 3000 rpm for 20-30 seconds.
- Incubate the cells in ice for 45 minutes.
- After 45 minutes, heat the tubes in the 42 C heat block for a maximum of 90 seconds.
- The same tubes should be placed in ice and should be incubated for 5 minutes.
- Afterwards, 450 ul LB should be added to the cells to complete them to 500 ul.
- The microcentrifuge tubes are then sticked to the shaker horizantally and shaked for 1 hour with 320 rpm at 37 C.
- 150 ul of the mixture(200 ul for digestion) is then placed on the plate to spread.
- It is then spread on the plate and the plates are incubated at 37 C for 16 hours.
Troubleshooting for Transformation
- While using the fire, do not use gloves so that the gloves don't burn.
- The incubation time of the LB Broth doesn't matter.
- The plasmids should be placed at the bottom of the microcentrifuge tube.
- Compotent cells should be carried in ice and the tranfer of them should be as quick as possible.
- The heat shock should be done no more than 90 seconds for optimum results.
- While spreading the cells, do not apply to much force on the LB Broth layer so that the surface is smooth. This will make the colony selection easier.
- Work close to fire while spreading the cells and allow the minimum air conctact.
March 31 Saturday
- We did ligation for the first time. The ligation was successful and this meant that our education was complete.
April
April 2 Monday
We tried to clarify how the project would work.
Two ideas were given
1)A system consisting of 2 bacterias with 1 producing bad smell and the other producing good smell. 1 of these will give put bad smell and the other will get rid of this smell and turn into something good and also inhibate the other one.
2)A system in which a bacteria removes bad smell and uses the products to produce good smell. The bacteria will use receptors to detect the products of the removal process and use them to give out good smell.
April 5 Thursday
- We discussed the ideas from last saturday. We weren`t able to find a conclusion.
- Also our research topics were discussed and we learned what the chemical structure of the aromas are. The enzymes required were searched. With this we learned that the limonene, banana and wintergreen were in the iGEM kit.
- The enzymes required to produce geraniol was learned. We could order them now.
For information on Geraniol: http://en.wikipedia.org/wiki/Geraniol
April 7 Saturday
- We electrophorased RFP once again to fully comprehend the procudure.
April 9 Monday
- We continued our research on the compatible enzymes and aromas for our project but sadly nothing was found. This meant that geraniol was probably going to be our main compound.
- The system that is going to be implemented was finally chosen
The First System was the Receptor System The Second System was the Inhıbation System
The Inhibation System was chosen.
The receptor system had the difficulty of finding parts. The inhibation system was more easy to accomplish in comparison to the receptor system.
- Our team photo was taken by a group of photographers which were taking pictures of the school for display.
April 21 Saturday
- We transformated the parts E0022 and E0032.
These parts are the reporters Cyan Fluorescent Protein(E0022) and Yellow Fluorescent Protein(E0032).
Since these parts have the ability to give off color, we could see if we were successful in doing transformation.
April 26 Thursday
- We discussed what we can do for human practice.
Several Ideas Were Given Out:
1)Making a film
2)Making a photonovel
3)Visits to a kindergarden and,a primary school and a high school.
4)Preparing a synthetic biology survey
5)Making a board game
6)Making a computer game
7)Preparing a journal
April 28 Saturday
- The LB Media of CFP(E0022) and YFP(E0032) was isolated. The results were positive.
Since we were going to start our project, it had to begin with the iGEM kit. We had to dilute the parts for transformation.
- We diluted the following parts:
1)C0061 [http://partsregistry.org/wiki/index.php?title=Part:BBa_C0061]
2)C0062 [http://partsregistry.org/wiki/index.php?title=Part:BBa_C0062]
3)R0062 [http://partsregistry.org/wiki/index.php?title=Part:BBa_R0062]
4)R0063 [http://partsregistry.org/wiki/index.php?title=Part:BBa_R0063]
5)K118024 [http://partsregistry.org/wiki/index.php?title=Part:BBa_K118024]
6)K118025 [http://partsregistry.org/wiki/index.php?title=Part:BBa_K118025]
7)J45120 [http://partsregistry.org/wiki/index.php?title=Part:BBa_J45120]
8)J45200 [http://partsregistry.org/wiki/index.php?title=Part:BBa_J45200]
9)J45320 [http://partsregistry.org/wiki/index.php?title=Part:BBa_J45320]
10)J09855 [http://partsregistry.org/wiki/index.php?title=Part:BBa_J09855]
11)J23100 [http://partsregistry.org/wiki/index.php?title=Part:BBa_J23100]
12)J52034 [http://partsregistry.org/wiki/index.php?title=Part:BBa_J52034]
May
May 2 Wednesday
- The diluted parts from last week were tranformated. Not all of us were able to do the procudure before. With this day, everyone had done transformation.
May 9 Wednesday
- When we came to the lab, we saw that the transformations from last week were not successful. We transformated the same parts again.
1st Transformation Day - Fail
May 11 Friday
- Our arrival to the lab revealed that we couldn't successfully transformate for the second time. This result led us to find our mistake. We did several things to locate our mistake. Now we had nothing to do but wait for a few days to see what's wrong.
2nd Transformation Day - Fail
May 15 Tuesday
- The results of our experiments showed that the compotent cells that we have used were not okay. We repeated the process to ensure that we really figured out what the problem is. Yes,the problem was the compotent cells. The only problem was that we needed to make new compotent cells. Since this process takes time and our lack of experience on making compotent cells is huge,this meant great time loss for us.
The last 2 transformations were unsuccessful because our compotent cells did not work properly.
May 18 Friday
- We had a new batch of compotent cells and this meant that we could finally hope to see colonies after the transformation.
- We transformated the same parts once again. Only this time we had colonies on the plate. This proved success.
3rd Transformation Day - Success
May 21 Monday
- We prepared LB media from the colonies of our (finally not fail) transformation plates. We put them in the vacuum furnace for overnight incubation. Now all we had to do was wait.
May 22 Tuesday
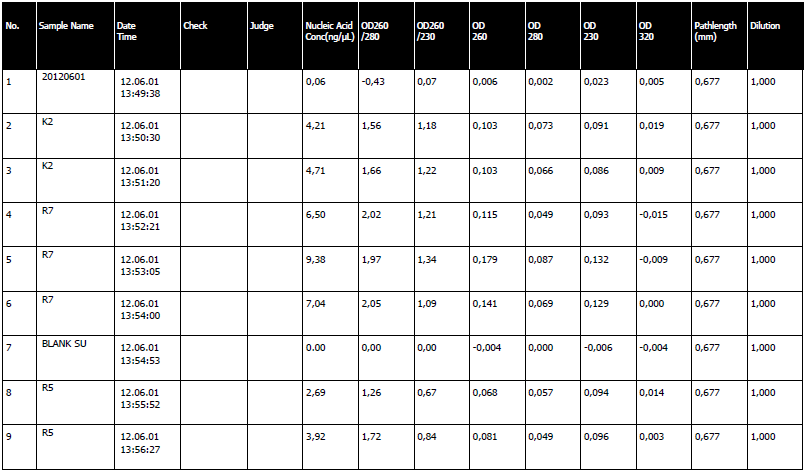
- We isolated our LB media. When we went to spectrophotometer for the results, it was embrassing. Our plasmids had a concentration of approximately 2 ng/ml. We made another patch of LB media to isolate again.
1st Isolation Day - Fail
May 26 Saturday
- We had the same horrible results with the isolation. Again, LB media preparation...
2nd Isolation Day - Fail
May 27 Sunday
- Same awesome results were acquired with the isolation. We repeated the process again.
3rd Isolation Day - Fail
May 29 Tuesday
- The LB media certainly had colonies in it. So we could isolate to see if we could succeed this time. Unfortunately the nucleic acid concentrations were again too little to digest. This meant that something wrong was happening during the isolation and we couldn't go wrong so many times.
- We did experiments to detect what the problem was, what was causing failure?
4th Isolation Day - Fail
May 30 Wednesday
- The experiments from yesterday showed that our kit was not doing its job. We conducted one last experiment to be sure.
- Another batch of LB media was prepared.
June
June 1 Friday
- Another isolation was done today. Since the kit was not working, it was a fail again.
5th Isolation Day - Fail
June 2 Saturday
- The last 4 isolations had failed because of the kit. This was the reason for sure.
- We ordered a new isolation kit from Fermentas.
- We went to the Turkish Olimpiads to watch the singing finals.
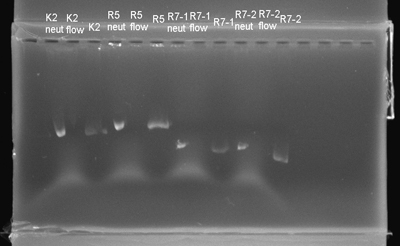
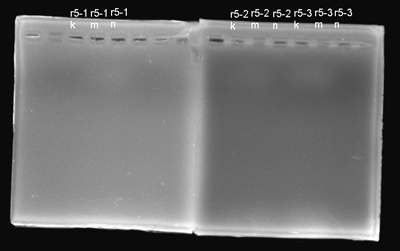
- We electrophorased yesterday's isolations.
June 3 Sunday
- Fermentas reported that the kit was going to arrive tomorrow.
- We prepared LB media for the next day's isolation.
- We electrophorased yesterday's isolations. The results were awful. We had nothing on the gel. It had probably moved out of the gel.
June 4 Monday
- We prepared the American Visa Application Forms for the visa. It consumed hours and wasted our experiment time but we have no choice but to get it.
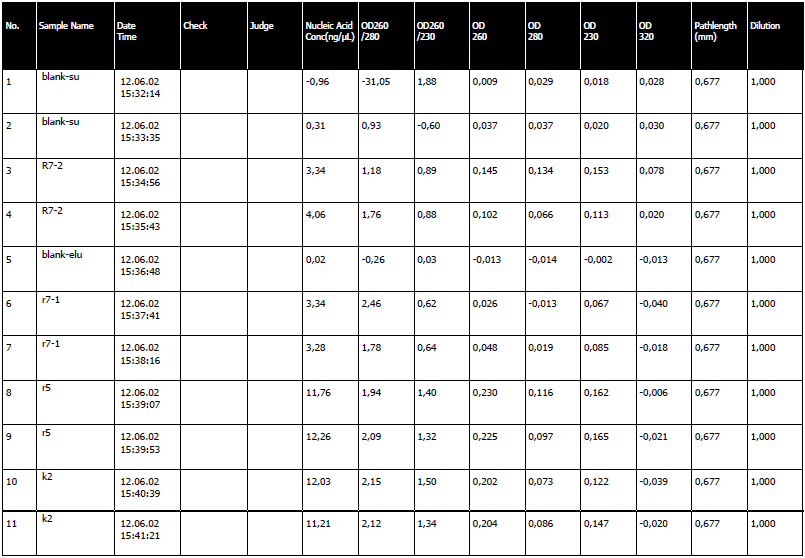
- The LB media from yesterday was isolated with the new Fermentas kit. It was triumph. We had a very high nucleic acid concentration, an average of 100 ng/ul to be exact.
This meant that we could finally pass the isolation step.
6th Isolation Day - Success
June 5 Tuesday
- We tried to get a randezvous for the visa application from the U.S. Embassy but sadly, the phones were busy and we couldn't reach them. The risk of not being able to get a visa appeared. We hope that this doesn't happen.
- We transformated the following parts again.
1)C0061 2)C0062 3)R0062 4)R0063 5)K118024 6)K118025 7)J45120 8)J45200 9)J45320 10)J09855 11)J23100 12)J52034
The plates were placed in the vacuum furnace for overnight incubation.
- The electrophorased the isolations and confirmed that the process was not a blowout again.
- We digested these plasmids. The next step was ligation and we could be one step closer to finishing our project.
June 6 Wednesday
- We isolated the other 10 parts but the Lysis Solution bubbled during the transfer. When it bubbles, it gets spoilt so the isolation was a fail.
June 7 Thursday
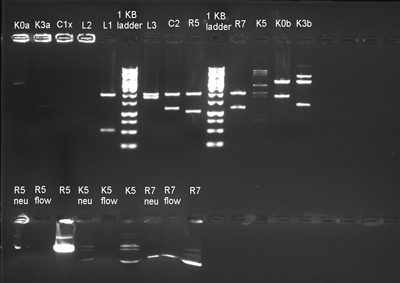
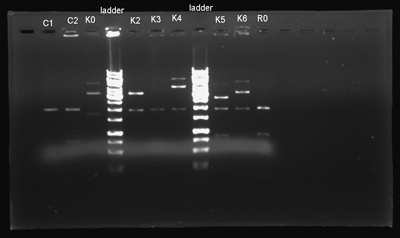
- We isolated the parts once more and electrophorased them. The isolation was okay this time.
- We digested the DNA and electrophorased them to see the results.
June 8 Friday
- Our Visa Application Day was today and we went to the U.S. Ambassy at 12.45. We think that we will be able to get the visa and that there won't be a problem.
- We digested the 2 parts and did gel extraction.
- We ligated the aroma parts with the Lux casette.
- The plasmids were then transformated and placed in the vacuum furnace for overnight incubation
<forum_subtle/>
 "
"

